A while back I got the idea to dry a kombucha scoby to see if I could use it as an interesting material for making a wallet or a book cover. Although I didn’t know it at the time, this wasn’t an original idea – others have been experimenting with this for a while!
This is the basic process I’ve been using, and so far it seems to work pretty well.
IMPORTANT: As with any fermentation, results can vary wildly based on air temperature, specific ingredients (including water!), time of year, and a number of other factors. If this doesn’t work for you the first time, try again!
Definitions
- kombucha: a beverage made by fermenting sweet tea
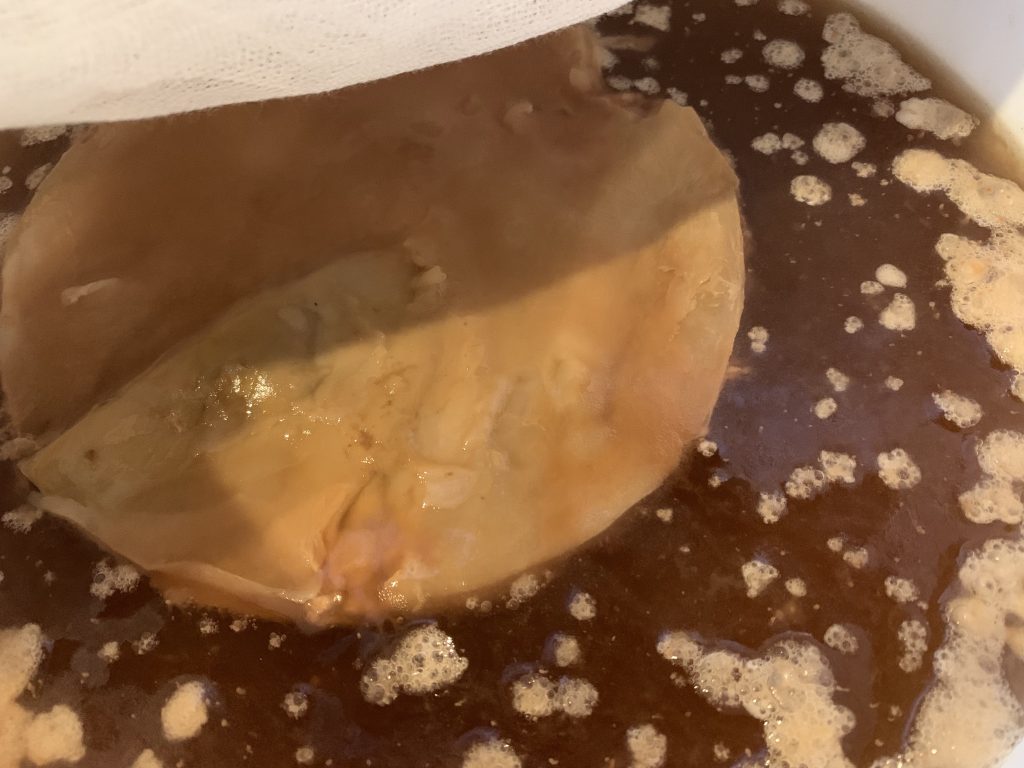
- SCOBY aka scoby or symbiotic colony of bacteria and yeast: the squishy but strong pancake-like thing that floats on top of fermenting kombucha. It is made primarily of cellulose, and is also home to a varying combination of bacteria and yeast. It looks pretty gross! It often has brown strands growing from the bottom; those are small colonies of yeast
- starter tea: some unflavored kombucha that has been fermented for a while, perhaps 10 days or so, and is quite sour
Materials
- a kombucha scoby – any size, although the bigger it is the quicker the process will go. These can be purchased online (which is where my first one came from), acquired from a friend who brews, or even generated from some unflavored commercial kombucha
- 1-2 cups (240-480ml) “starter” tea or vinegar – basically you need something acidic to bring down the pH of your sweet tea to make it comfortable for the kombucha bacteria and yeast and uncomfortable for undesireable buggies (like mold). I recommend using some kombucha from a finished batch: this will be full of the bacteria and yeast you need, which acidifies and gets the process started much quicker. You can also use some vinegar.
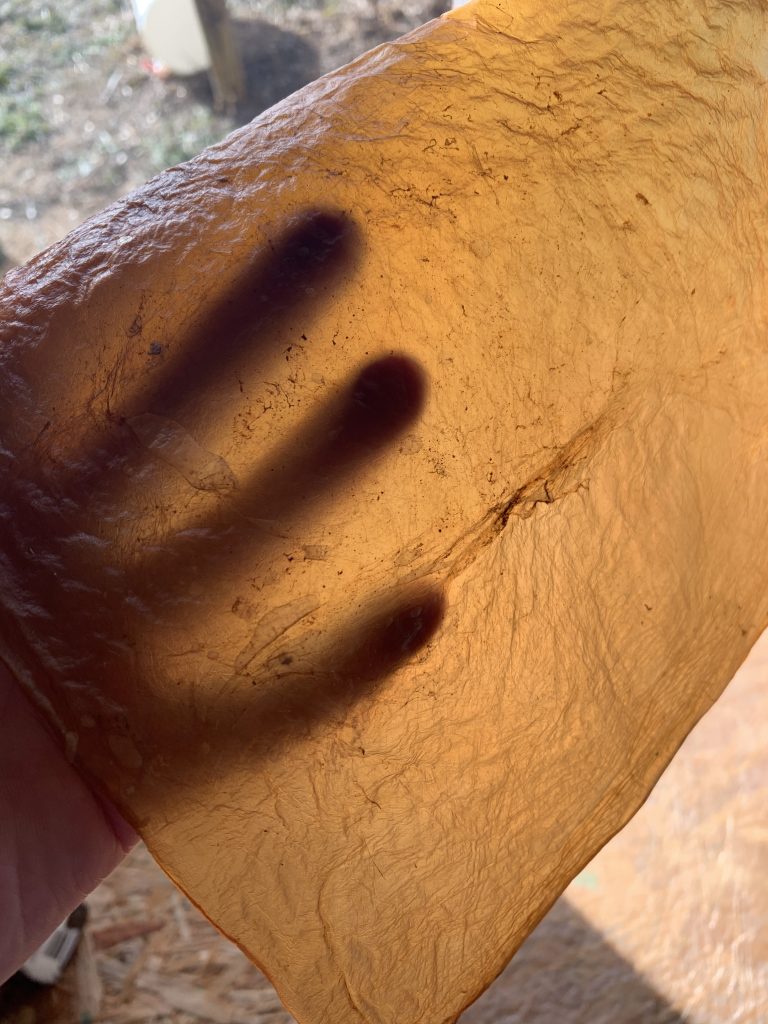
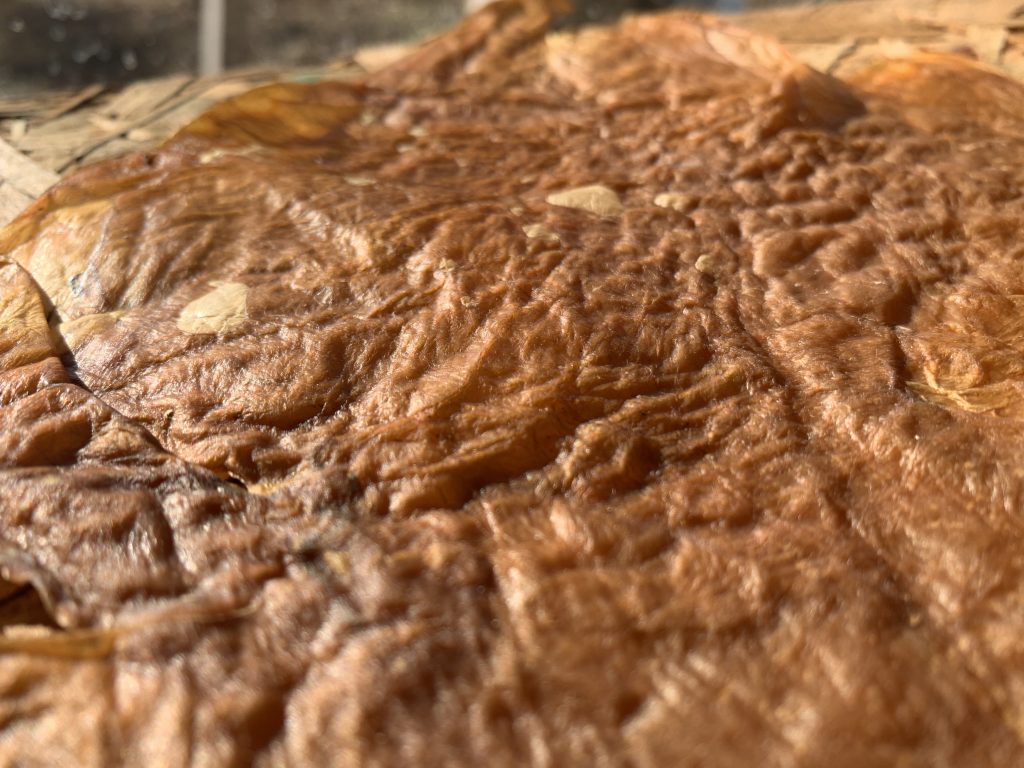
- black or green tea, unflavored – I’ve found black tea works better and creates a brown-colored material with a lot of interesting texture. Green tea takes a longer time and creates a very pale material.
- a vessel – for best results, use some sort of container that will provide a large surface area of liquid. In other words, use a wide container, not a tall or thin container. I use large plastic bins with only about 3 inches (7.62cm) of liquid at the bottom. For brewing kombucha to drink I usually use glass, but for kombucha leather plastic seems to work fine too. WARNING: Do not drink the finished kombucha unless you’re sure the container is food-safe. There is a risk that fermenting kombucha in plastic will leach toxic chemicals into the liquid. This is probably fine for making kombucha leather, but not fine for human consumption.
- coconut oil – the amount will depend on the size of your scoby
- water – I live in the country and have great-tasting well water. I use it unfiltered for my kombucha (for drinking and for leather) and it works great. I’ve read that municipal water sources that contain chlorine and possibly other chemicals may harm your scoby, which could result in an inferior product – or it could kill the bacteria and yeast entirely. If in doubt, use filtered water, or boil water to evaporate the chlorine.
- sugar – I use plain white sugar but I’m sure any type of sugar would be fine, and probably yield more interesting results
Amounts
In general for each gallon (3.8 liters) of kombucha I use:
- 8 bags black tea
- 1 gallon (3.8 liters) water
- 1 cup sugar
Incidentally this is the same ratio I use for brewing kombucha for drinking.
Higher amounts of tea will probably make your finished product stronger, higher amounts of sugar will probably add more character (yeast love sugar, and the more active the yeast are, the more bubbles you get, which often get embedded in the scoby). A ratio of more water to less tea will take longer, and the scoby may be less strong, but it will still work
Process
- Boil water. I generally boil a small amount of water to steep the tea, then I add more cold water to bring the temperature closer to body temperature/room temperature
- Steep tea for 30 minutes or more
- Remove tea, add sugar, dissolve fully
- Pour the liquid (which is now sweet tea) into your container
- After making sure the liquid is body temperature or lower, add the starter tea or vinegar, and scoby
- Put a non-airtight lid on the container and move to a place that doesn’t get any direct sunlight. I ferment mine in the basement. I’ve found that propping my containers up off the floor and sliding heating pads underneath help keep my fermentations active. Be sure that the heating pad isn’t too hot; you want to slightly warm the air around the ‘booch, not boil it. I aim for about 6 inches (15.2 cm) between the heating pad and the container. Note that even in a cold basement you don’t need the heating pad. Generally the colder the temperature, the longer the process will take… but it will still work
- Let ferment until the scoby reaches your desired thickness. Keep in mind that it will shrink considerably when it dries! A scoby that is the width of a Sharpie marker will dry to the thickness of thick paper. If you want a really thick end product, you’ll need to ferment for a long time. That said, even thin scobies are quite strong
- Remove the scoby from the liquid and air dry. I’ve tried using a dehydrator and that dried it out too quickly. You can either dry the scoby in the sun, or indoors with or without a fan nearby. In my cold basement, a large sheet of scoby near the sun dried within 24 hours with a fan blowing on it. I’ve read that if you dry your scoby around something else, it will dry tightly to that form. I wonder how this would work for making a phone case or tool handle, but I haven’t tried it yet.
- If you want a more flexible, durable, and more water resistant scoby, add oil. I’ve been using coconut oil. I just scoop with my hands and rub it into the scoby, then I let it sit for a few hours to absorb the oil.
- After sitting in the oil, buff the oil in / rub off the excess, and allow to dry for a while longer
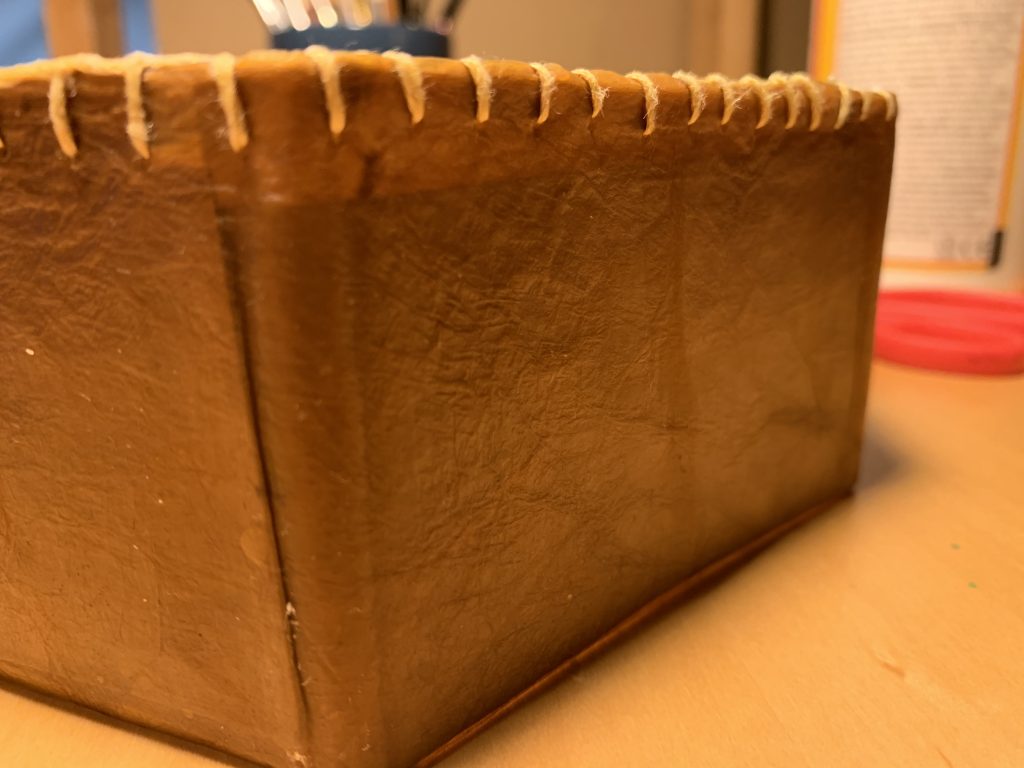
- From there you can use it like a strong fabric or leather. I’ve found that sewing with an embroidery needle and floss works well
Have you tried this? Let me know how it went! I’m always revising my process, so if you discover something cool, let me know
